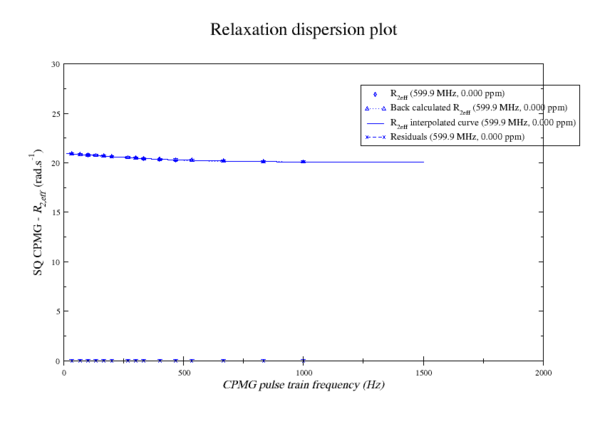
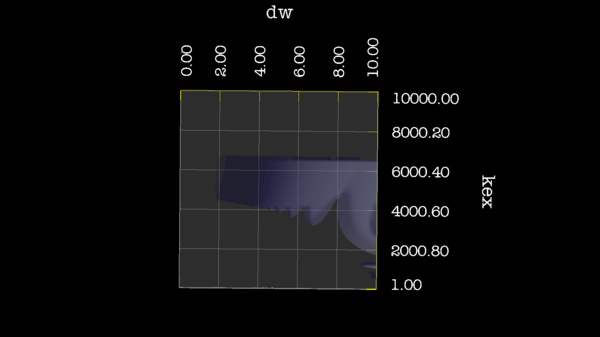
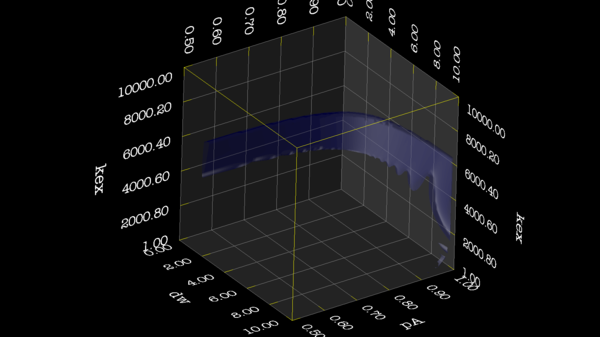
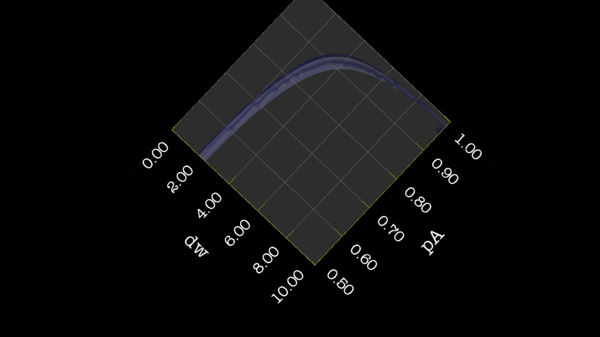
###############################################################################
#                                                                             #
# Copyright (C) 2013-2014 Troels E. Linnet                                    #
#                                                                             #
# This file is part of the program relax (http://www.nmr-relax.com).          #
#                                                                             #
# This program is free software: you can redistribute it and/or modify        #
# it under the terms of the GNU General Public License as published by        #
# the Free Software Foundation, either version 3 of the License, or           #
# (at your option) any later version.                                         #
#                                                                             #
# This program is distributed in the hope that it will be useful,             #
# but WITHOUT ANY WARRANTY; without even the implied warranty of              #
# MERCHANTABILITY or FITNESS FOR A PARTICULAR PURPOSE.  See the               #
# GNU General Public License for more details.                                #
#                                                                             #
# You should have received a copy of the GNU General Public License           #
# along with this program.  If not, see <http://www.gnu.org/licenses/>.       #
#                                                                             #
###############################################################################
# Script for calculating synthetics CPMG data.

# Python module imports.
from os import sep
from tempfile import mkdtemp
from math import sqrt
import sys

# relax module imports.
from auto_analyses.relax_disp import Relax_disp
from lib.io import open_write_file
from data_store import Relax_data_store; ds = Relax_data_store()
from pipe_control.mol_res_spin import return_spin, spin_loop
from specific_analyses.relax_disp.data import generate_r20_key, loop_exp_frq, loop_offset_point
from specific_analyses.relax_disp import optimisation
from status import Status; status = Status()
# The variables already defined in relax.
from specific_analyses.relax_disp.variables import EXP_TYPE_CPMG_SQ, MODEL_PARAMS
# Analytical
from specific_analyses.relax_disp.variables import MODEL_CR72, MODEL_IT99, MODEL_TSMFK01, MODEL_B14
# Analytical full
from specific_analyses.relax_disp.variables import MODEL_CR72_FULL, MODEL_B14_FULL
# NS : Numerical Solution
from specific_analyses.relax_disp.variables import MODEL_NS_CPMG_2SITE_3D, MODEL_NS_CPMG_2SITE_STAR, MODEL_NS_CPMG_2SITE_EXPANDED
# NS full
from specific_analyses.relax_disp.variables import MODEL_NS_CPMG_2SITE_3D_FULL, MODEL_NS_CPMG_2SITE_STAR_FULL

# Analysis variables.
##################################################################################
# The dispersion model to test.
if not hasattr(ds, 'data'):
    ### Take a numerical model to create the data.
    ## The "NS CPMG 2-site 3D full" is here the best, since you can define both r2a and r2b.
    #model_create = MODEL_NS_CPMG_2SITE_3D
    #model_create = MODEL_NS_CPMG_2SITE_3D_FULL
    #model_create = MODEL_NS_CPMG_2SITE_STAR
    #model_create = MODEL_NS_CPMG_2SITE_STAR_FULL
    model_create = MODEL_NS_CPMG_2SITE_EXPANDED
    #model_create = MODEL_CR72
    #model_create = MODEL_CR72_FULL
    #model_create = MODEL_B14
    #model_create = MODEL_B14_FULL

    ### The select a model to analyse with.
    ## Analytical : r2a = r2b
    model_analyse = MODEL_CR72
    #model_analyse = MODEL_IT99
    #model_analyse = MODEL_TSMFK01
    #model_analyse = MODEL_B14

    ## Analytical full : r2a != r2b
    #model_analyse = MODEL_CR72_FULL
    #model_analyse = MODEL_B14_FULL
    ## NS : r2a = r2b
    #model_analyse = MODEL_NS_CPMG_2SITE_3D
    #model_analyse = MODEL_NS_CPMG_2SITE_STAR
    #model_analyse = MODEL_NS_CPMG_2SITE_EXPANDED
    ## NS full : r2a = r2b
    #model_analyse = MODEL_NS_CPMG_2SITE_3D_FULL
    #model_analyse = MODEL_NS_CPMG_2SITE_STAR_FULL

    ## Experiments
    # Exp 1
    sfrq_1 = 599.8908617*1E6
    r20_key_1 = generate_r20_key(exp_type=EXP_TYPE_CPMG_SQ, frq=sfrq_1)
    time_T2_1 = 0.06
    ncycs_1 = [28, 4, 32, 60, 2, 10, 16, 8, 20, 50, 18, 40, 6, 12, 24]
    # Here you define the direct R2eff errors (rad/s), as being added or subtracted for the created R2eff point in the corresponding ncyc cpmg frequence.
    #r2eff_errs_1 = [0.05, -0.05, 0.05, -0.05, 0.05, -0.05, 0.05, -0.05, 0.05, -0.05, 0.05, -0.05, 0.05, -0.05, 0.05]
    r2eff_errs_1 = [0.0] * len(ncycs_1)
    exp_1 = [sfrq_1, time_T2_1, ncycs_1, r2eff_errs_1]

    sfrq_2 = 499.8908617*1E6
    r20_key_2 = generate_r20_key(exp_type=EXP_TYPE_CPMG_SQ, frq=sfrq_2)
    time_T2_2 = 0.04
    ncycs_2 = [20, 16, 10, 36, 2, 12, 4, 22, 18, 40, 14, 26, 8, 32, 24, 6, 28 ]
    # Here you define the direct R2eff errors (rad/s), as being added or subtracted for the created R2eff point in the corresponding ncyc cpmg frequence.
    #r2eff_errs_2 = [0.05, -0.05, 0.05, -0.05, 0.05, -0.05, 0.05, -0.05, 0.05, -0.05, 0.05, -0.05, 0.05, -0.05, 0.05, -0.05, 0.05]
    r2eff_errs_2 = [0.0] * len(ncycs_2)
    exp_2 = [sfrq_2, time_T2_2, ncycs_2, r2eff_errs_2]

    # Collect all exps
    exps = [exp_1, exp_2]
    #exps = [exp_1]

    # Add more spins here.
    spins = [
            ['Ala', 1, 'N', {'r2': {r20_key_1: 25.0, r20_key_2: 24.0}, 'r2a': {r20_key_1: 25.0, r20_key_2: 24.0}, 'r2b': {r20_key_1: 25.0, r20_key_2: 24.0}, 'kex': 2200.0, 'pA': 0.993, 'dw': 0.5} ]
            #['Ala', 2, 'N', {'r2': {r20_key_1: 15.0, r20_key_2: 14.0}, 'r2a': {r20_key_1: 15.0, r20_key_2: 14.0}, 'r2b': {r20_key_1: 15.0, r20_key_2: 14.0}, 'kex': 2200.0, 'pA': 0.993, 'dw': 1.5} ]
            ]

    # Collect the eksperiment to simulate.
    ds.data = [model_create, model_analyse, spins, exps]

# Setup variables to be used
##################################################################################
# The tmp directory.
if not hasattr(ds, 'tmpdir'):
    ds.tmpdir = None

# The results directory.
if not hasattr(ds, 'resdir'):
    ds.resdir = None

# Do set_grid_r20_from_min_r2eff.
if not hasattr(ds, 'set_grid_r20_from_min_r2eff'):
    ds.set_grid_r20_from_min_r2eff = True

# Remove insignificant level.
if not hasattr(ds, 'insignificance'):
    ds.insignificance = 0.0

# The grid search size (the number of increments per dimension). "None" will set default values.
if not hasattr(ds, 'GRID_INC'):
    #ds.GRID_INC = None
    ds.GRID_INC = 21

# The do clustering.
if not hasattr(ds, 'do_cluster'):
    ds.do_cluster = False

# The function tolerance.  This is used to terminate minimisation once the function value between iterations is less than the tolerance.
# The default value is 1e-25.
if not hasattr(ds, 'set_func_tol'):
    ds.set_func_tol = 1e-25

# The maximum number of iterations.
# The default value is 1e7.
if not hasattr(ds, 'set_max_iter'):
    ds.set_max_iter = 10000000

# The verbosity level.
if not hasattr(ds, 'verbosity'):
    ds.verbosity = 1

# The rel_change WARNING level.
if not hasattr(ds, 'rel_change'):
    ds.rel_change = 0.05

# The plot_curves.
if not hasattr(ds, 'plot_curves'):
    ds.plot_curves = False

# The conversion for ShereKhan at http://sherekhan.bionmr.org/.
if not hasattr(ds, 'sherekhan_input'):
    ds.sherekhan_input = False

# The set r2eff err, for defining the error on the graphs and in the fitting weight.
# We set the error to be the same for all ncyc eksperiments.
if not hasattr(ds, 'r2eff_err'):
    ds.r2eff_err = 0.1

# The print result info.
if not hasattr(ds, 'print_res'):
    ds.print_res = True

# Make a dx map to be opened om OpenDX.
# To map the hypersurface of chi2, when altering kex, dw and pA.
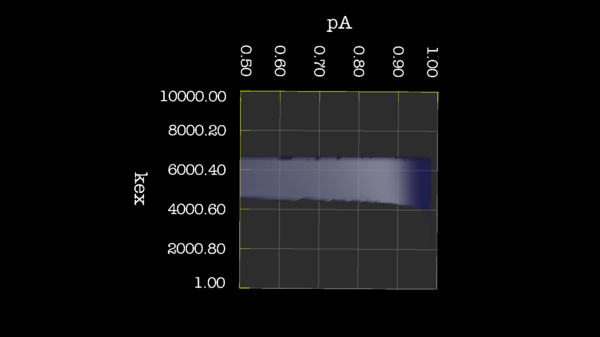
if not hasattr(ds, 'opendx'):
    #ds.opendx = False
    ds.opendx = True

# Which parameters to map on chi2 surface.
if not hasattr(ds, 'dx_params'):
    ds.dx_params = ['dw', 'pA', 'kex']

# How many increements to map for each of the parameters.
# Above 20 is good. 70 - 100 is a quite good resolution.
# 4 is for speed tests.
if not hasattr(ds, 'dx_inc'):
    #ds.dx_inc = 70
    ds.dx_inc = 4

# If bounds set to None, uses the normal Grid search bounds.
if not hasattr(ds, 'dx_lower_bounds'):
    ds.dx_lower_bounds = None
    #ds.dx_lower_bounds = [0.0, 0.5, 1.0 ]

# If bounds set to None, uses the normal Grid search bounds.
if not hasattr(ds, 'dx_upper_bounds'):
    #ds.dx_upper_bounds = None
    ds.dx_upper_bounds = [10.0, 1.0, 3000.0]

# If dx_chi_surface is None, it will find Innermost, Inner, Middle and Outer Isosurface
# at 10, 20, 50 and 90 percentile of all chi2 values.
if not hasattr(ds, 'dx_chi_surface'):
    ds.dx_chi_surface = None
    #ds.dx_chi_surface = [1000.0, 20000.0, 30000., 30000.00]

##################################################################################

# Define repeating functions.
##################################################################################
# Define function to store grid results.
def save_res(res_spins):
    res_list = []
    for res_name, res_num, spin_name, params in res_spins:
        cur_spin_id = ":%i@%s"%(res_num, spin_name)
        cur_spin = return_spin(cur_spin_id)

        # Save all the paramers to loop throgh later.
        ds.model_analyse_params = cur_spin.params

        par_dic = {}
        # Now read the parameters.
        for mo_param in cur_spin.params:
            par_dic.update({mo_param : getattr(cur_spin, mo_param) })

        # Append result.
        res_list.append([res_name, res_num, spin_name, par_dic])

    return res_list

# Define function print relative change
def print_res(cur_spins=None, grid_params=None, min_params=None, clust_params=None, dx_params=[]):
    # Define list to hold data.
    dx_set_val = list(range(len(dx_params)))
    dx_clust_val = list(range(len(dx_params)))

    # Compare results.
    if ds.print_res:
        print("\n########################")
        print("Generated data with MODEL:%s"%(model_create))
        print("Analysing with MODEL:%s."%(model_analyse))
        print("########################\n")

    for i in range(len(cur_spins)):
        res_name, res_num, spin_name, params = cur_spins[i]
        cur_spin_id = ":%i@%s"%(res_num, spin_name)
        cur_spin = return_spin(cur_spin_id)

        # Now read the parameters.
        if ds.print_res:
            print("For spin: '%s'"%cur_spin_id)
        for mo_param in cur_spin.params:
            # The R2 is a dictionary, depending on spectrometer frequency.
            if isinstance(getattr(cur_spin, mo_param), dict):
                grid_r2 = grid_params[mo_param]
                min_r2 = min_params[mo_param]
                clust_r2 = clust_params[mo_param]
                set_r2 = params[mo_param]
                for key, val in min_r2.items():
                    grid_r2_frq = grid_r2[key]
                    min_r2_frq = min_r2[key]
                    clust_r2_frq = min_r2[key]
                    set_r2_frq = set_r2[key]
                    frq = float(key.split(EXP_TYPE_CPMG_SQ+' - ')[-1].split('MHz')[0])
                    rel_change = sqrt( (clust_r2_frq - set_r2_frq)**2/(clust_r2_frq)**2 )
                    if ds.print_res:
                        print("%s %s %s %s %.1f GRID=%.3f MIN=%.3f CLUST=%.3f SET=%.3f RELC=%.3f"%(cur_spin.model, res_name, cur_spin_id, mo_param, frq, grid_r2_frq, min_r2_frq, clust_r2_frq, set_r2_frq, rel_change) )
                    if rel_change > ds.rel_change:
                        if ds.print_res:
                            print("###################################")
                            print("WARNING: %s Have relative change above %.2f, and is %.4f."%(key, ds.rel_change, rel_change))
                            print("###################################\n")
            else:
                grid_val = grid_params[mo_param]
                min_val = min_params[mo_param]
                clust_val = clust_params[mo_param]
                set_val = params[mo_param]
                rel_change = sqrt( (clust_val - set_val)**2/(clust_val)**2 )
                if ds.print_res:
                    print("%s %s %s %s GRID=%.3f MIN=%.3f CLUST=%.3f SET=%.3f RELC=%.3f"%(cur_spin.model, res_name, cur_spin_id, mo_param, grid_val, min_val, clust_val, set_val, rel_change) )
                if rel_change > ds.rel_change:
                    if ds.print_res:
                        print("###################################")
                        print("WARNING: %s Have relative change above %.2f, and is %.4f."%(mo_param, ds.rel_change, rel_change))
                        print("###################################\n")

                # Store to dx map.
                if mo_param in dx_params:
                    dx_set_val[ds.dx_params.index(mo_param)] = set_val
                    dx_clust_val[ds.dx_params.index(mo_param)] = clust_val

    return dx_set_val, dx_clust_val

# Now starting
##################################################################################
# Set up the data pipe.
##################################################################################

# Extract the models
model_create = ds.data[0]
model_analyse = ds.data[1]

# Create the data pipe.
ds.pipe_name = 'base pipe'
ds.pipe_type = 'relax_disp'
ds.pipe_bundle = 'relax_disp'
ds.pipe_name_r2eff = "%s_%s_R2eff"%(model_create, ds.pipe_name )
pipe.create(pipe_name=ds.pipe_name , pipe_type=ds.pipe_type, bundle = ds.pipe_bundle)

# Generate the sequence.
cur_spins = ds.data[2]
for res_name, res_num, spin_name, params in cur_spins:
    spin.create(res_name=res_name, res_num=res_num, spin_name=spin_name)

# Set isotope
spin.isotope('15N', spin_id='@N')

# Extract experiment settings.
exps = ds.data[3]

# Now loop over the experiments, to set the variables in relax.
exp_ids = []
for exp in exps:
    sfrq, time_T2, ncycs, r2eff_errs = exp
    exp_id = 'CPMG_%3.1f' % (sfrq/1E6)
    exp_ids.append(exp_id)

    ids = []
    for ncyc in ncycs:
        nu_cpmg = ncyc / time_T2
        cur_id = '%s_%.1f' % (exp_id, nu_cpmg)
        ids.append(cur_id)

        # Set the spectrometer frequency.
        spectrometer.frequency(id=cur_id, frq=sfrq)

        # Set the experiment type.
        relax_disp.exp_type(spectrum_id=cur_id, exp_type=EXP_TYPE_CPMG_SQ)

        # Set the relaxation dispersion CPMG constant time delay T (in s).
        relax_disp.relax_time(spectrum_id=cur_id, time=time_T2)

        # Set the relaxation dispersion CPMG frequencies.
        relax_disp.cpmg_setup(spectrum_id=cur_id, cpmg_frq=nu_cpmg)

print("\n\nThe experiment IDs are %s." % ids)

## Now prepare to calculate the synthetic R2eff values.
pipe.copy(pipe_from=ds.pipe_name , pipe_to=ds.pipe_name_r2eff, bundle_to = ds.pipe_bundle)
pipe.switch(pipe_name=ds.pipe_name_r2eff)

# Then select the model to create data.
relax_disp.select_model(model=model_create)

# First loop over the defined spins and set the model parameters.
for i in range(len(cur_spins)):
    res_name, res_num, spin_name, params = cur_spins[i]
    cur_spin_id = ":%i@%s"%(res_num, spin_name)
    cur_spin = return_spin(cur_spin_id)

    if ds.print_res:
        print("For spin: '%s'"%cur_spin_id)
    for mo_param in cur_spin.params:
        # The R2 is a dictionary, depending on spectrometer frequency.
        if isinstance(getattr(cur_spin, mo_param), dict):
            set_r2 = params[mo_param]

            for key, val in set_r2.items():
                # Update value to float
                set_r2.update({ key : float(val) })
                print(cur_spin.model, res_name, cur_spin_id, mo_param, key, float(val))
            # Set it back
            setattr(cur_spin, mo_param, set_r2)
        else:
            before = getattr(cur_spin, mo_param)
            setattr(cur_spin, mo_param, float(params[mo_param]))
            after = getattr(cur_spin, mo_param)
            print(cur_spin.model, res_name, cur_spin_id, mo_param, before)

## Now doing the back calculation of R2eff values.
# First loop over the frequencies.
for exp_type, frq, ei, mi in loop_exp_frq(return_indices=True):
    exp_id = exp_ids[mi]
    exp = exps[mi]
    sfrq, time_T2, ncycs, r2eff_errs = exp

    # Then loop over the spins.
    for res_name, res_num, spin_name, params in cur_spins:
        cur_spin_id = ":%i@%s"%(res_num, spin_name)
        cur_spin = return_spin(cur_spin_id)

        ## First do a fake R2eff structure.
        # Define file name
        file_name = "%s%s.txt" % (exp_id, cur_spin_id .replace('#', '_').replace(':', '_').replace('@', '_'))
        file = open_write_file(file_name=file_name, dir=ds.tmpdir, force=True)

        # Then loop over the points, make a fake R2eff value.
        for offset, point, oi, di in loop_offset_point(exp_type=EXP_TYPE_CPMG_SQ, frq=frq, return_indices=True):
            string = "%.15f 1.0 %.3f\n"%(point, ds.r2eff_err)
            file.write(string)

        # Close file.
        file.close()

        # Read in the R2eff file to create the structure.
        # This is a trick, or else relax complains.
        relax_disp.r2eff_read_spin(id=exp_id, spin_id=cur_spin_id, file=file_name, dir=ds.tmpdir, disp_point_col=1, data_col=2, error_col=3)

        ### Now back calculate values from parameters, and stuff R2eff it back.
        print("Generating data with MODEL:%s, for spin id:%s"%(model_create, cur_spin_id))
        r2effs = optimisation.back_calc_r2eff(spin=cur_spin, spin_id=cur_spin_id)

        file = open_write_file(file_name=file_name, dir=ds.resdir, force=True)
        ## Loop over the R2eff structure
        # Loop over the points.
        for offset, point, oi, di in loop_offset_point(exp_type=EXP_TYPE_CPMG_SQ, frq=frq, return_indices=True):
            # Extract the Calculated R2eff.
            r2eff = r2effs[ei][0][mi][oi][di]

            # Find the defined error setup.
            set_r2eff_err = r2eff_errs[di]

            # Add the defined error to the calculated error.
            r2eff_w_err = r2eff + set_r2eff_err

            string = "%.15f %.15f %.3f %.15f\n"%(point, r2eff_w_err, ds.r2eff_err, r2eff)
            file.write(string)

        # Close file.
        file.close()

        # Read in the R2eff file to put into spin structure.
        relax_disp.r2eff_read_spin(id=exp_id, spin_id=cur_spin_id, file=file_name, dir=ds.resdir, disp_point_col=1, data_col=2, error_col=3)

### Now do fitting.
# Change pipe.
ds.pipe_name_MODEL = "%s_%s"%(ds.pipe_name , model_analyse)
pipe.copy(pipe_from=ds.pipe_name , pipe_to=ds.pipe_name_MODEL, bundle_to = ds.pipe_bundle)
pipe.switch(pipe_name=ds.pipe_name_MODEL)

# Copy R2eff, but not the original parameters
value.copy(pipe_from=ds.pipe_name_r2eff, pipe_to=ds.pipe_name_MODEL, param='r2eff')

# Then select model.
relax_disp.select_model(model=model_analyse)

print("Analysing with MODEL:%s."%(model_analyse))

# Remove insignificant
relax_disp.insignificance(level=ds.insignificance)

# Perform Grid Search.
if ds.GRID_INC:
    # Set the R20 parameters in the default grid search using the minimum R2eff value.
    # This speeds it up considerably.
    if ds.set_grid_r20_from_min_r2eff:
        relax_disp.set_grid_r20_from_min_r2eff(force=False)

    # Then do grid search.
    grid_search(lower=None, upper=None, inc=ds.GRID_INC, constraints=True, verbosity=ds.verbosity)

# If no Grid search, set the default values.
else:
    for param in MODEL_PARAMS[model_analyse]:
        value.set(param=param, index=None)
        # Do a grid search, which will store the chi2 value.
    #grid_search(lower=None, upper=None, inc=10, constraints=True, verbosity=ds.verbosity)

# Save result.
ds.grid_results = save_res(cur_spins)

## Now do minimisation.
minimise(min_algor='simplex', func_tol=ds.set_func_tol, max_iter=ds.set_max_iter, constraints=True, scaling=True, verbosity=ds.verbosity)

# Save results
ds.min_results = save_res(cur_spins)

# Now do clustering
if ds.do_cluster:
    # Change pipe.
    ds.pipe_name_MODEL_CLUSTER = "%s_%s_CLUSTER"%(ds.pipe_name , model_create)
    pipe.copy(pipe_from=ds.pipe_name , pipe_to=ds.pipe_name_MODEL_CLUSTER)
    pipe.switch(pipe_name=ds.pipe_name_MODEL_CLUSTER)

    # Copy R2eff, but not the original parameters
    value.copy(pipe_from=ds.pipe_name_r2eff, pipe_to=ds.pipe_name_MODEL_CLUSTER, param='r2eff')

    # Then select model.
    relax_disp.select_model(model=model_create)

    # Then cluster
    relax_disp.cluster('model_cluster', ":1-100")

    # Copy the parameters from before.
    relax_disp.parameter_copy(pipe_from=ds.pipe_name_MODEL, pipe_to=ds.pipe_name_MODEL_CLUSTER)

    # Now minimise.
    minimise(min_algor='simplex', func_tol=ds.set_func_tol, max_iter=ds.set_max_iter, constraints=True, scaling=True, verbosity=ds.verbosity)

    # Save results
    ds.clust_results = save_res(cur_spins)
else:
    ds.clust_results = ds.min_results

# Plot curves.
if ds.plot_curves:
    relax_disp.plot_disp_curves(dir=ds.resdir, force=True)

# The conversion for ShereKhan at http://sherekhan.bionmr.org/.
if ds.sherekhan_input:
    relax_disp.cluster('sherekhan', ":1-100")
    print(cdp.clustering)
    relax_disp.sherekhan_input(force=True, spin_id=None, dir=ds.resdir)

# Looping over data, to collect the results.
# Define which dx_params to collect for.
ds.dx_set_val, ds.dx_clust_val = print_res(cur_spins=cur_spins, grid_params=ds.grid_results[i][3], min_params=ds.min_results[i][3], clust_params=ds.clust_results[i][3], dx_params=ds.dx_params)

## Do a dx map.
# To map the hypersurface of chi2, when altering kex, dw and pA.
if ds.opendx:
    # First switch pipe, since dx.map will go through parameters and end up a "bad" place. :-)
    ds.pipe_name_MODEL_MAP = "%s_%s_map"%(ds.pipe_name, model_analyse)
    pipe.copy(pipe_from=ds.pipe_name , pipe_to=ds.pipe_name_MODEL_MAP, bundle_to = ds.pipe_bundle)
    pipe.switch(pipe_name=ds.pipe_name_MODEL_MAP)

    # Copy R2eff, but not the original parameters
    value.copy(pipe_from=ds.pipe_name_r2eff, pipe_to=ds.pipe_name_MODEL_MAP, param='r2eff')

    # Then select model.
    relax_disp.select_model(model=model_analyse)

    # First loop over the defined spins and set the model parameters which is not in the dx.dx_params.
    for i in range(len(cur_spins)):
        res_name, res_num, spin_name, params = cur_spins[i]
        cur_spin_id = ":%i@%s"%(res_num, spin_name)
        cur_spin = return_spin(cur_spin_id)

        for mo_param in cur_spin.params:
            # The R2 is a dictionary, depending on spectrometer frequency.
            if isinstance(getattr(cur_spin, mo_param), dict):
                set_r2 = params[mo_param]
                if mo_param not in ds.dx_params:
                    for key, val in set_r2.items():
                        # Update value to float
                        set_r2.update({ key : float(val) })
                        print("Setting param:%s to :%f"%(key, float(val)))
                    # Set it back
                    setattr(cur_spin, mo_param, set_r2)

            # For non dict values.
            else:
                if mo_param not in ds.dx_params:
                    before = getattr(cur_spin, mo_param)
                    setattr(cur_spin, mo_param, float(params[mo_param]))
                    after = getattr(cur_spin, mo_param)
                    print("Setting param:%s to :%f"%(mo_param, after))

        cur_model = model_analyse.replace(' ', '_')
        file_name_map = "%s_map%s" % (cur_model, cur_spin_id.replace('#', '_').replace(':', '_').replace('@', '_'))
        file_name_point = "%s_point%s" % (cur_model, cur_spin_id .replace('#', '_').replace(':', '_').replace('@', '_'))
        dx.map(params=ds.dx_params, map_type='Iso3D', spin_id=cur_spin_id, inc=ds.dx_inc, lower=ds.dx_lower_bounds, upper=ds.dx_upper_bounds, axis_incs=10, file_prefix=file_name_map, dir=ds.resdir, point=[ds.dx_set_val, ds.dx_clust_val], point_file=file_name_point, chi_surface=ds.dx_chi_surface)
        # vp_exec:  A flag specifying whether to execute the visual program automatically at start-up.
        #dx.execute(file_prefix=file_name, dir=ds.resdir, dx_exe='dx', vp_exec=True)

        if ds.print_res:
            print("For spin: '%s'"%cur_spin_id)
            print("Params for dx map is")
            print(ds.dx_params)
            print("Point creating dx map is")
            print(ds.dx_set_val)
            print("Minimises point in dx map is")
            print(ds.dx_clust_val)

# Print result again after dx map.
if ds.opendx:
    print_res(cur_spins=cur_spins, grid_params=ds.grid_results[i][3], min_params=ds.min_results[i][3], clust_params=ds.clust_results[i][3])
